Web Client
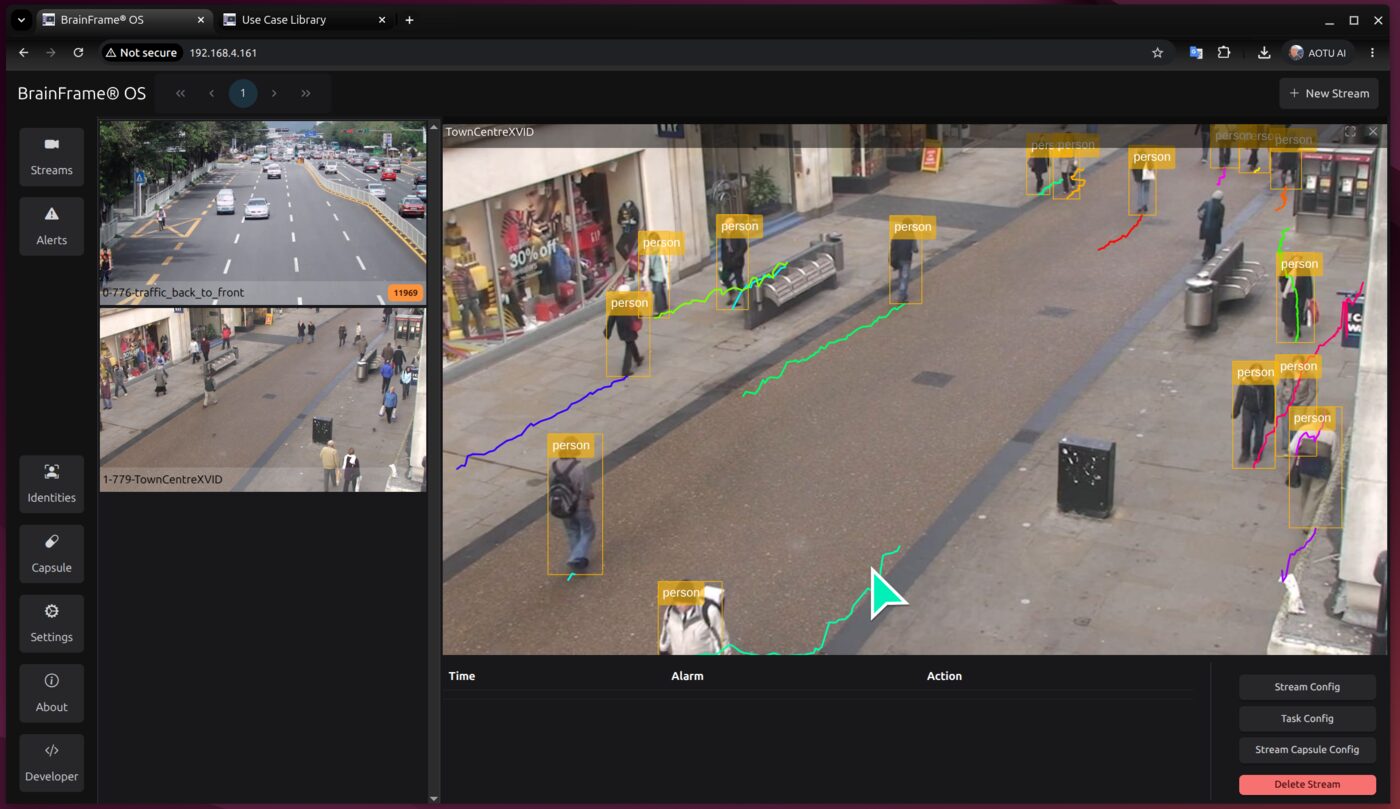
The BrainFrame Web Client is the browser interface of BrainFrame OS. Use it to add video streams, load capsules, draw zones and lines, create alarms, and watch live detections. Nothing needs to be installed on your computer.
Open the Web Client
Enter the IP address of the BrainFrame server in a browser:
http://<your-server-ip>
Tip
Use the server's network IP address rather than localhost. This lets the other applications that run in
containers, such as the Talkdown.ai App, reach BrainFrame at the same address.
The main menu on the left has these entries:
| Menu | Purpose |
|---|---|
| Streams | Show your video streams. |
| Alerts | Review the alerts that alarms have triggered. |
| Identities | Manage the identities that BrainFrame can recognize. |
| Capsule | Load, enable, and configure capsules for all streams. |
| Settings | Change how the Web Client displays video and detections. |
| About | Show the BrainFrame version. |
| Developer | Open the Developer References menu, described below. |
Developer References
Click Developer at the bottom left of the main menu to bring up the Developer References menu. It opens the other BrainFrame applications and resources:
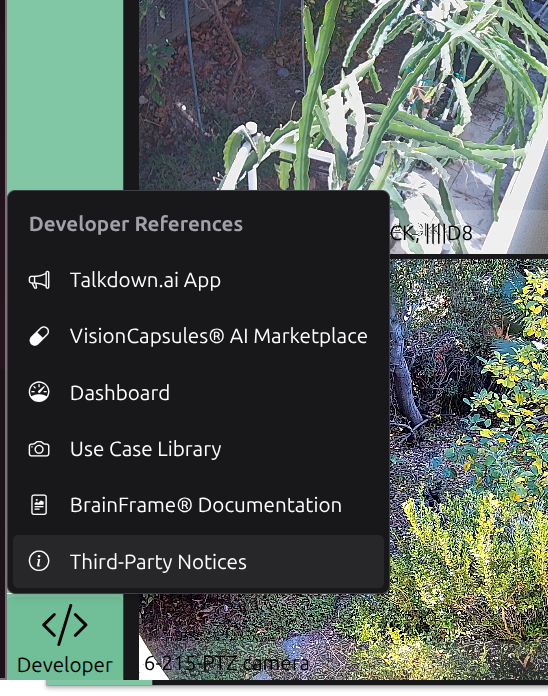
| Menu item | Opens |
|---|---|
| Talkdown.ai App | The Talkdown.ai App. |
| VisionCapsules® AI Marketplace | The AI Marketplace. |
| Dashboard | The Web Dashboard. |
| Use Case Library | The Use Case Library. |
| BrainFrame® Documentation | This documentation. |
| Third-Party Notices | The licenses of the third-party software that BrainFrame uses. |
Add a Stream
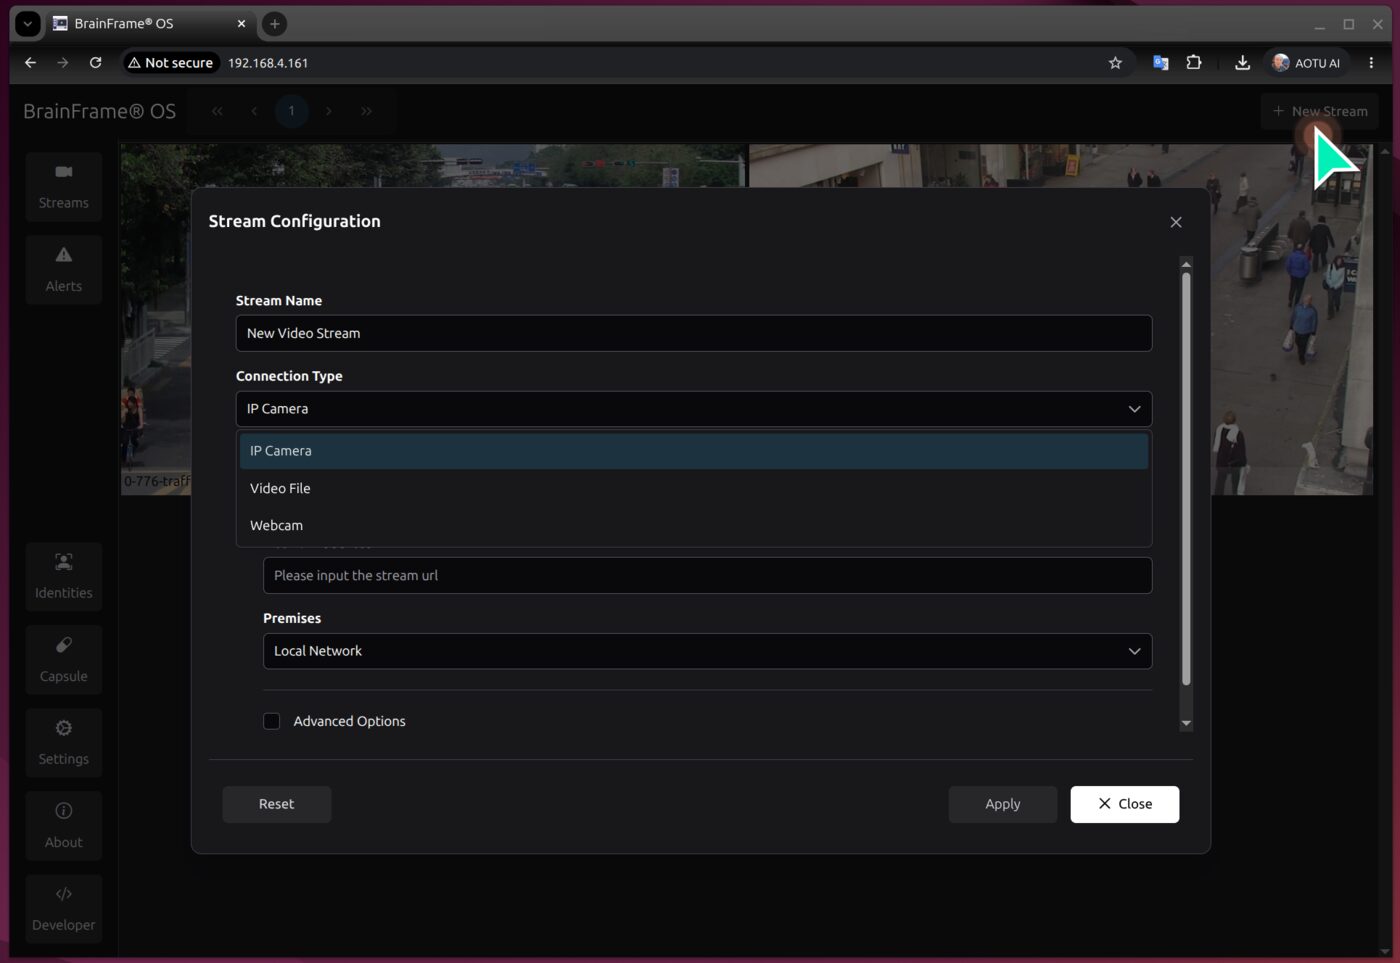
- Click + New Stream.
- Give the stream a name.
- Enter the address of the video source, for example the RTSP URL of an IP camera. IP cameras, local video files, and webcams are supported.
- Confirm to add the stream.
Advanced users can write their own GStreamer pipeline instead of using a URL.
To see the details of a stream, such as its connection type and network address, click the stream and then Stream Config. For more on streams and their options, see Streams. For help with camera URLs, see Connecting to IP Cameras.
Tip
To add many cameras at once, see brainframe-onvif-tools and REST API Apps.
View Streams
New streams appear in a grid of thumbnails. Click a stream to open the Player View, which shows the live video in the middle and your list of streams on the left. Use the buttons at the lower right to open Stream Config, Task Config, and Stream Capsule Config, or to delete the stream.
Media modes
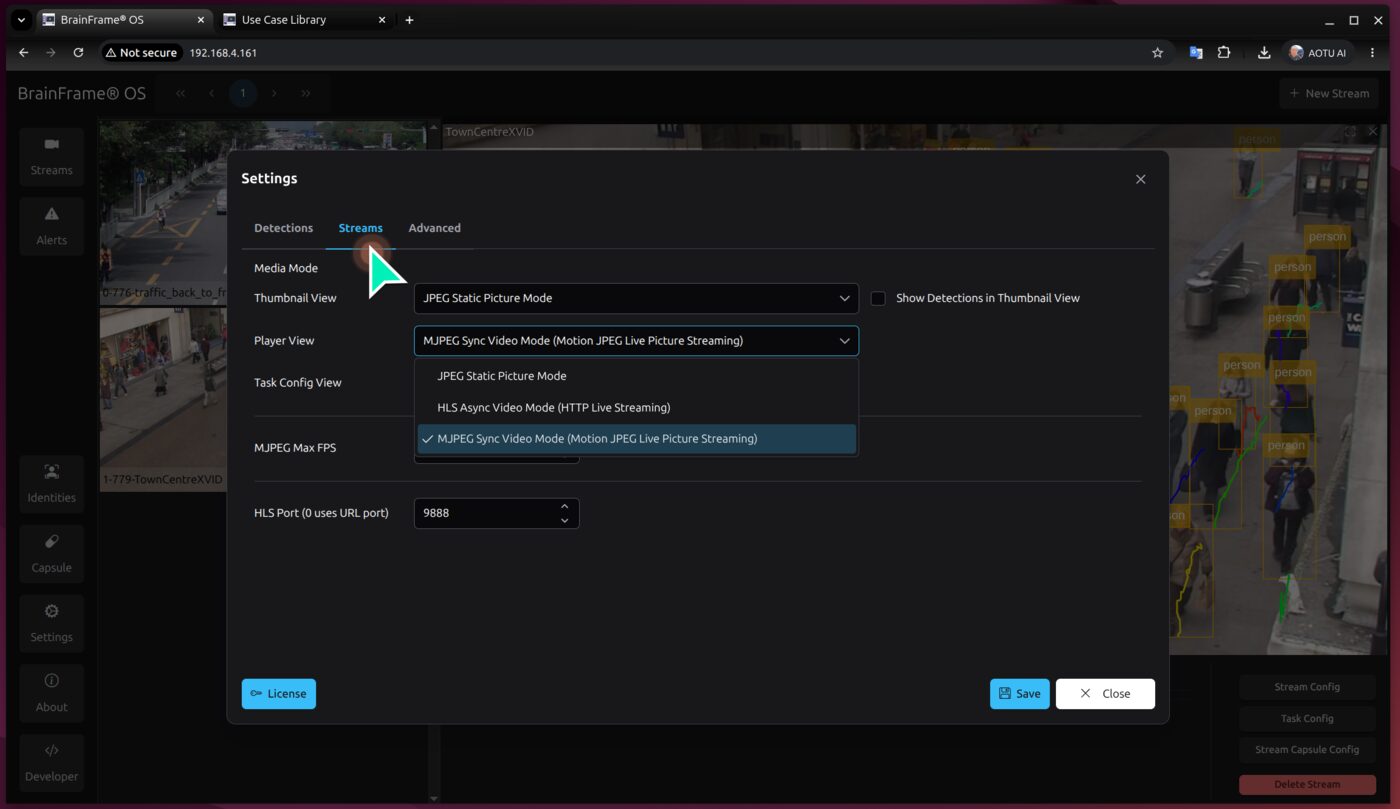
BrainFrame has three media modes. They trade video quality against hardware use. Choose them in Settings > Streams, separately for the thumbnail view, the player view, and the task configuration view.
| Mode | Description |
|---|---|
| MJPEG Sync Video Mode | Each video frame is shown together with its own inference results, so the detections always match the picture. This is the default for the player view. |
| JPEG Static Picture Mode | Shows still pictures instead of video. It turns off the heavy video decoding and rendering, which leaves more processing power for inference. Use it for large deployments, or where you do not need to watch live video. |
| HLS Async Video Mode | Plays a smooth live video stream by separating the video from the inference results. This uses less computing power, but the detections can lag behind the picture slightly. |
Select Show Detections in Thumbnail View to draw detections on the thumbnails, so you can see the analytics of every stream at once. The same dialog also sets the MJPEG maximum frame rate and the HLS port.
Choose what to display
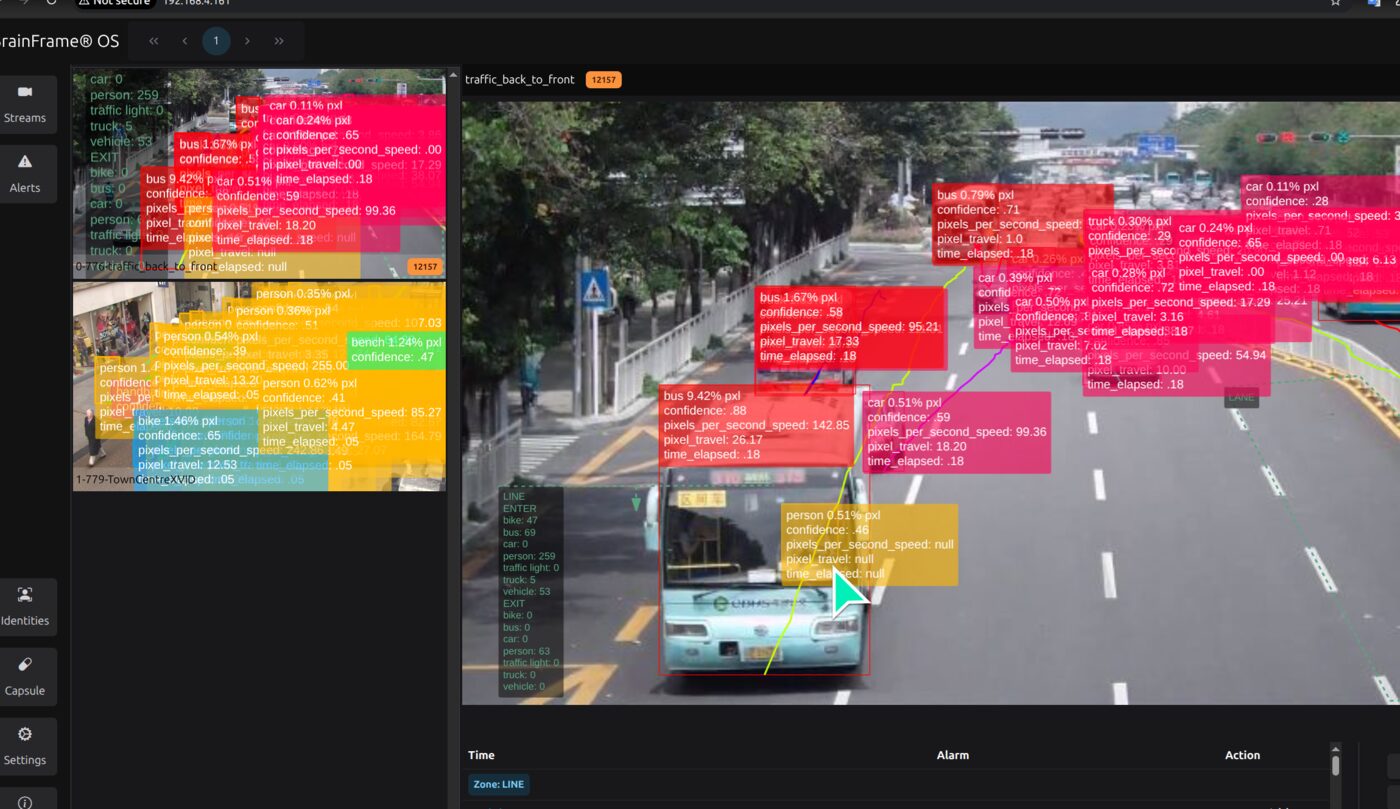
When many capsules run together, the overlay on the video can become crowded. Open Settings to choose which information to draw on the video.
Load and Configure Capsules
Capsules are the AI models that BrainFrame runs. You can download capsules from the VisionCapsules marketplace and load them into BrainFrame.
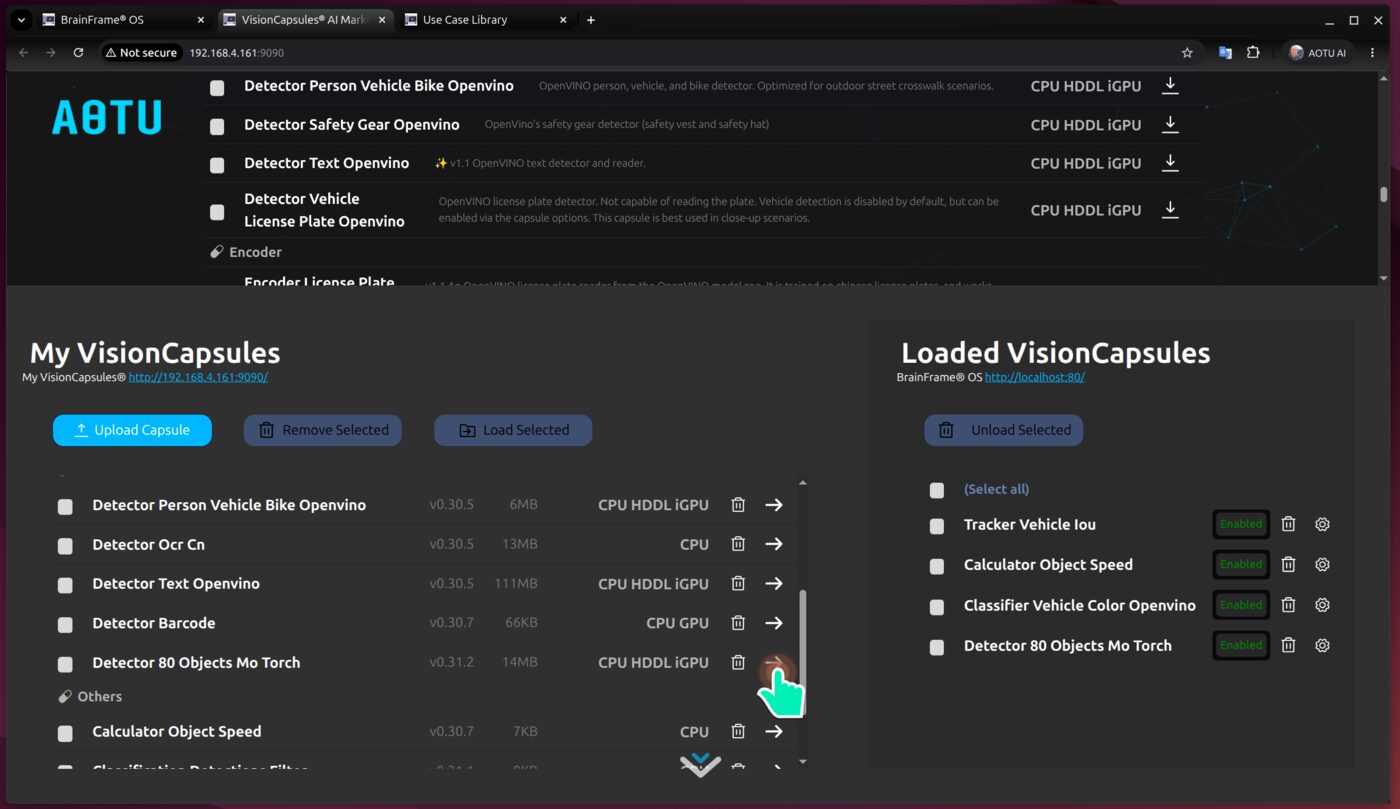
- Hover over a capsule to see details, such as the objects it can detect.
- Download a capsule, then load it into BrainFrame.
- A loaded capsule can be turned on or off without unloading it. Use the settings gear to adjust its options.
For the traffic example in this guide, four capsules are loaded: a person, vehicle, and bike detector, a vehicle IOU tracker, an object speed calculator, and a vehicle color classifier.
Click Capsule on the main menu to enable, disable, and configure capsules for all streams. To set a capsule only for one stream, open the stream and click Stream Capsule Config. After you turn a capsule on or off, or change an option, click Apply, and then OK.
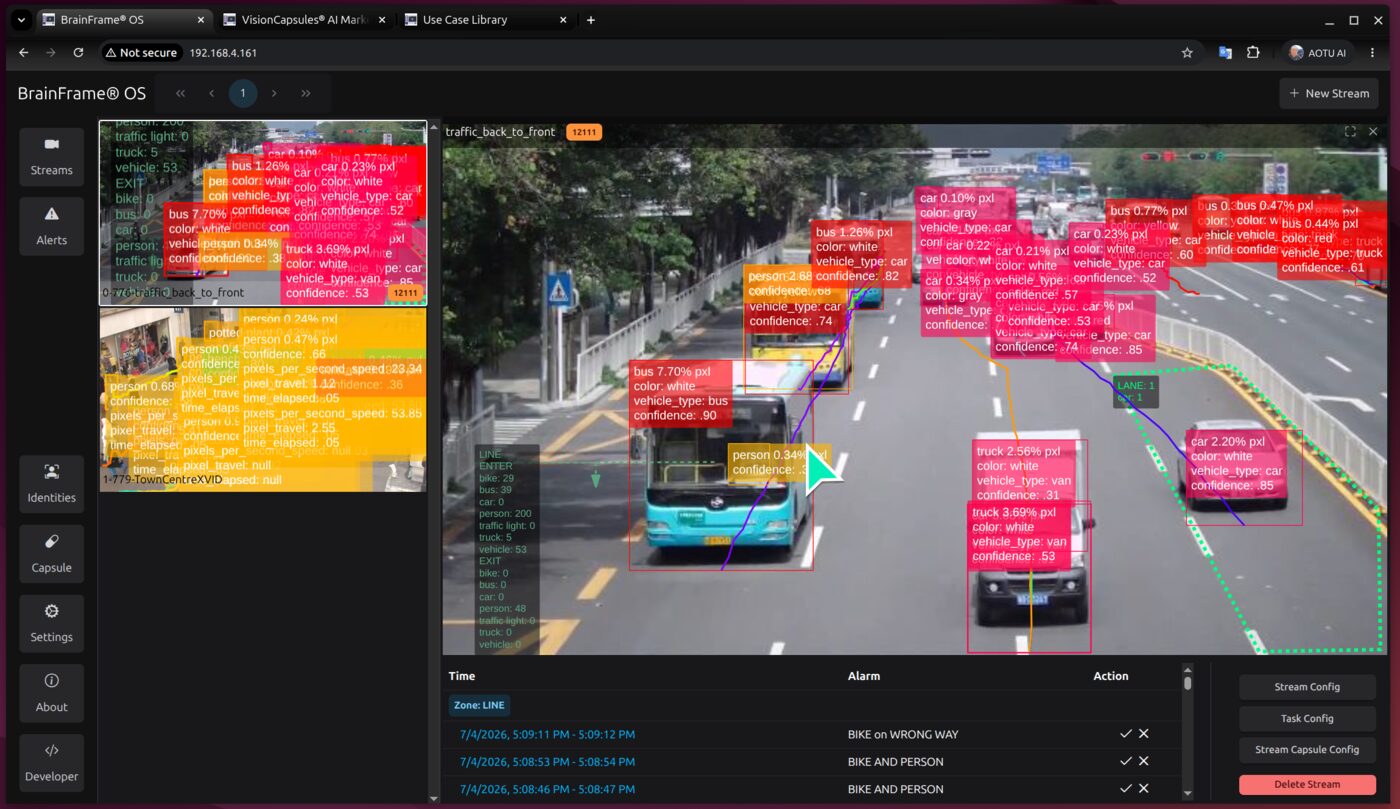
The detections update immediately. In this example, the color disappears from the bounding box when the color classifier is off, and the trajectory behind the vehicle disappears when the tracker is off. See Capsule Options for details.
Zones and Lines
Zones and lines select where in the video BrainFrame looks for events. They let you count objects that cross a line, find vehicles that go in the wrong direction, monitor speed, or measure how long an object stays in an area.
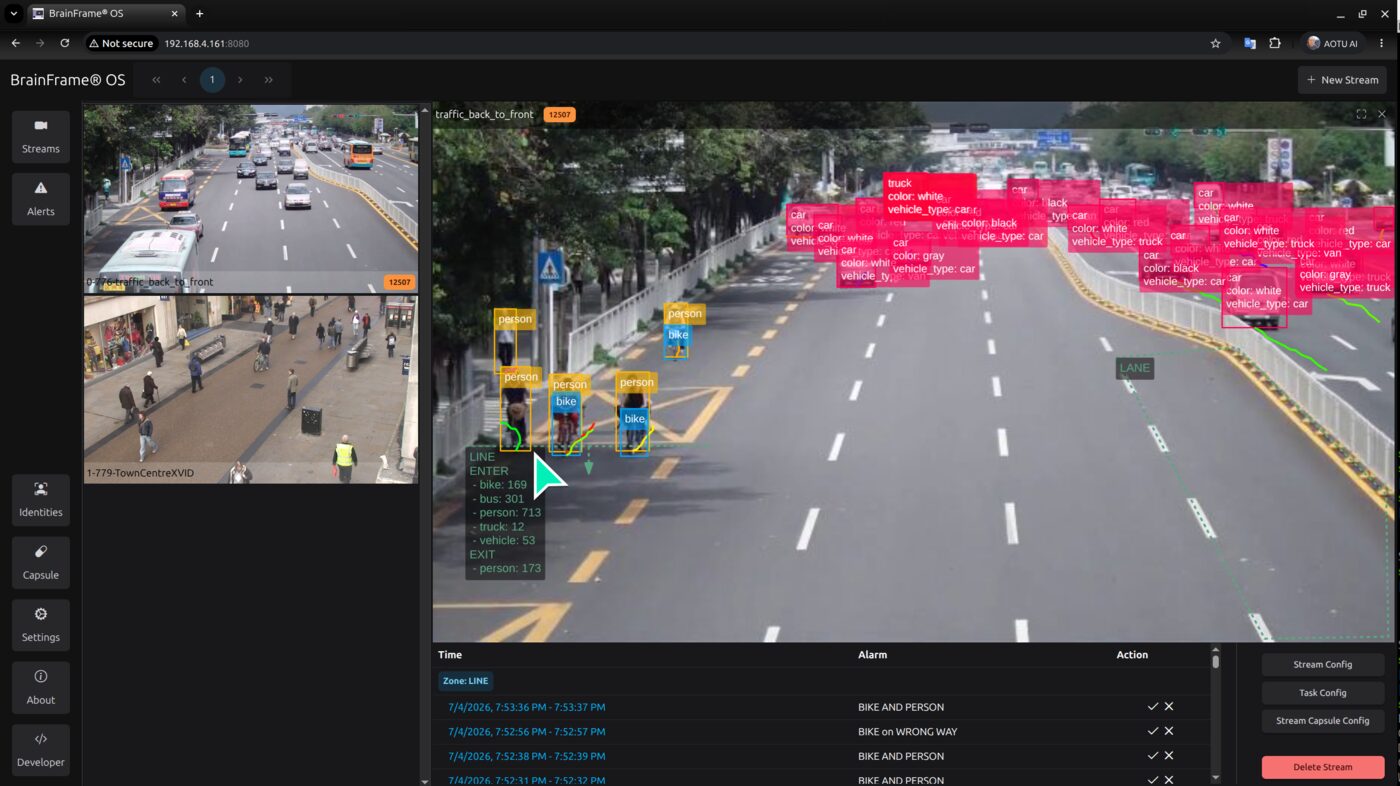
To add one:
- Open the stream and click Task Config.
- Click + Region or + Line.
- Name it, then draw it on the video with your mouse. For a region, draw a polygon.
- Click Confirm. The zone is active at once.
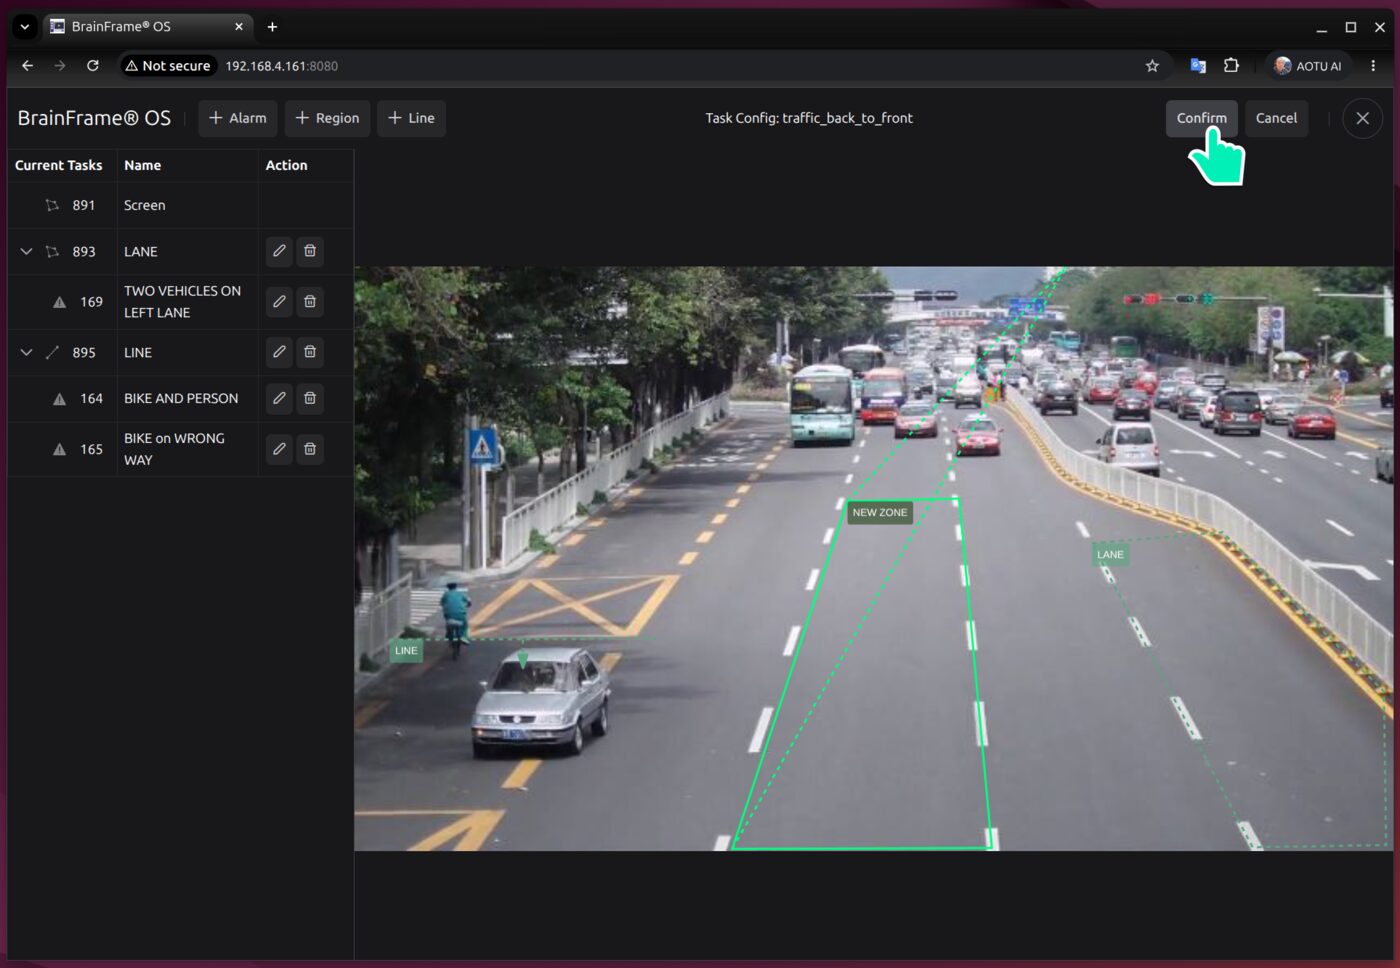
See Zones for more.
Alarms
An alarm triggers when the objects in a zone meet a condition.
- In Task Config, click + Alarm.
- Select the zone to monitor.
- Choose the Count Based or Rate Based type. A count-based alarm triggers on how many objects are in the zone. A rate-based alarm triggers on how quickly objects enter or leave.
- Set the condition: the comparison, the number, the object type, and, if needed, an attribute such as a color.
- Set how long the condition must hold, within what time window, and the times of day when the alarm is active.
- Click Save, then Confirm.
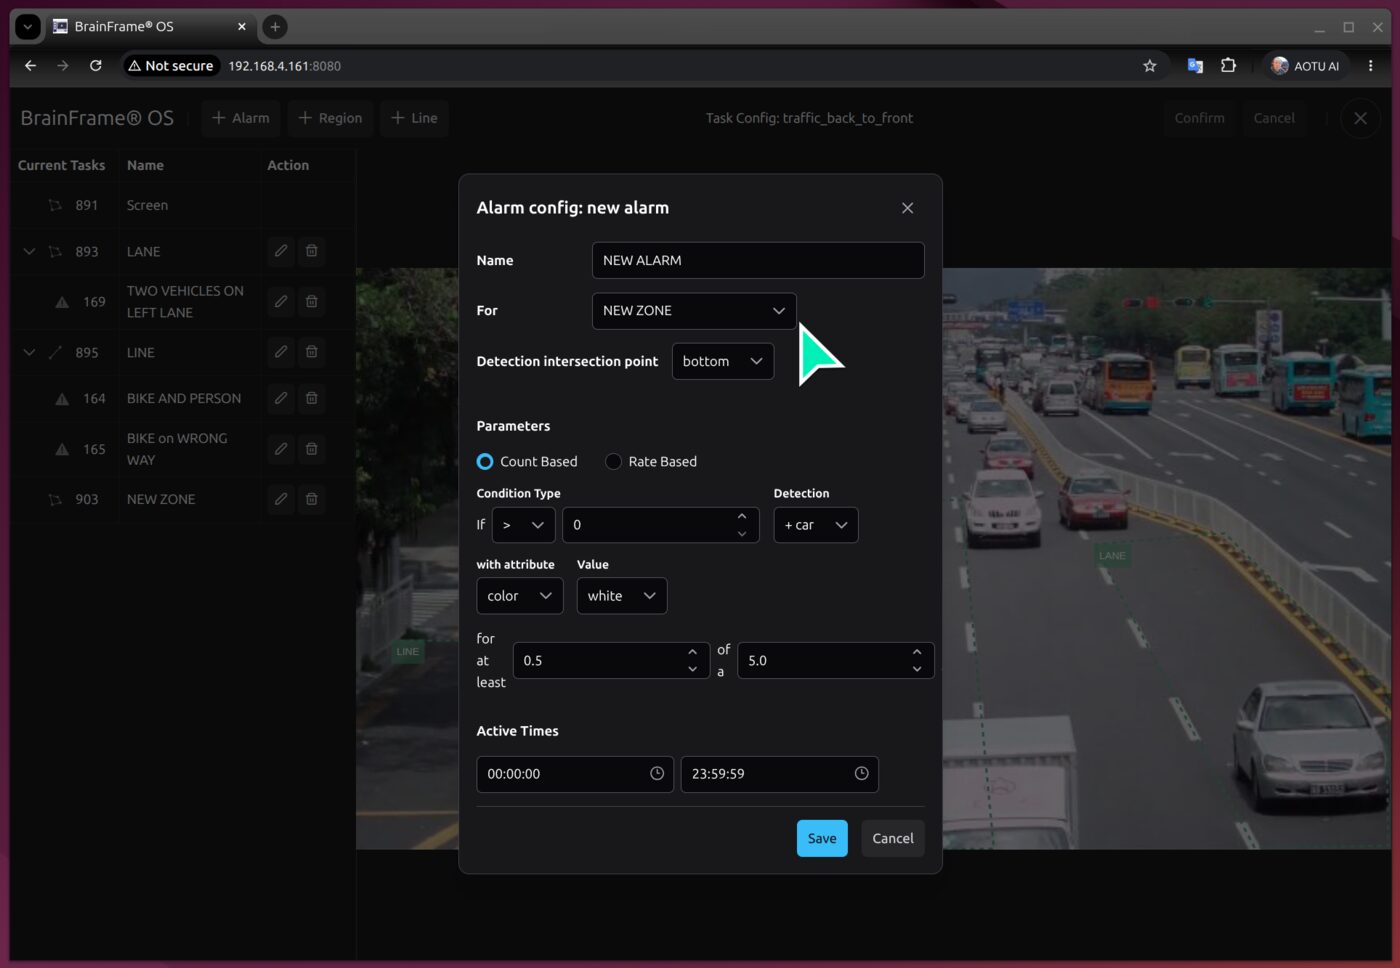
Triggered alarms are listed under Alerts. See Alarms for more.
Alarms can start real-world actions, such as email, sirens, and voice messages, through an application like the Talkdown.ai App.
Use the Data in Your Own Applications
- REST API: all live results, such as zone statuses, are available through the BrainFrame REST API. See the REST API reference. To find the zone status, open inference and then Get zone statuses, and see the data under Responses.
- Database: the results are stored in an SQL database. You can query it, or connect a dashboard to it. See Database Description.
Check the Version
Click About to see the version that is running. To check for new releases, see Downloads. To upgrade, see brainframe-cli.
Hardware
The server hardware decides how many streams and capsules you can run at once. See Server Hardware.